
ownCloud is an open-source & file sharing app platform. ownCloud is a universal file access platform that is hosted in your data center, on your servers, using your storage.
Moreover ownCloud offers you the ability to run a cloud storage service as a file sharing server. ownCloud also provides us self-hosted file sync and share app platform.
Features of ownCloud:
- ownCloud helps to keep our data in sync on our devices.
- ownCloud provides data accessibility through Android, and desktop clients (Windows, MAC, Linux) as well as mobile apps (Android and iPhone iOS)
- ownCloud helps to store files on external storage like Dropbox, Amazon S3, Google Drive, etc.
How to install ownCloud:
Do you know how to install the ownCloud server? You can easily get the latest release of ownCloud by installing ownCloud 9 on Centos & RHEL. Let’s see the procedure.
# Step 1
First of all, try to install CentOs in your system.
- Login in your server as a root.
- Update the system
# sudo yum update
# reboot -h now
# Step 2
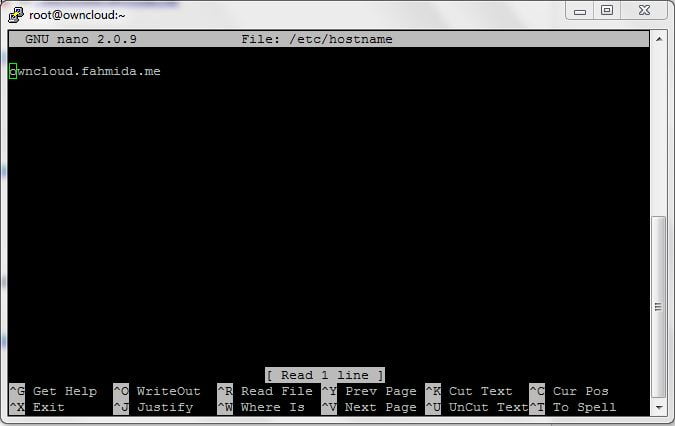
Change the hostname to a real domain or a fully qualified domain. For this article, I’ve used owncloud.fahmida.me as a fully qualified domain.
[root@fahmida ~]# hostname
fahmida
[root@fahmida ~]# hostname owncloud.fahmida.me
- Edit hostname “fahmida” to “ owncloud.fahmida.me”
[root@fahmida ~]# nano /etc/hosts
[root@fahmida ~]# nano /etc/hostname
- reboot the System
[root@fahmida ~]# reboot -h now
.
[root@fahmida ~]# hostname
owncloud.fahmida.me
To save this change press Ctrl + x
# Step 3
- Enable REMI & EPEL yum repositories in your system
Use these commands as per your operating system version
CentOS/RHEL 6:
[root@fahmida ~]# rpm -Uvh http://download.fedoraproject.org/pub/epel/6/x86_64/epel-release-6-8.noarch.rpm
[root@fahmida ~]# rpm -Uvh http://rpms.famillecollet.com/enterprise/remi-release-6.rpm

# Step 4
- Enable repi/remo for yum
# nano /etc/yum.repos.d/remi.repo
- Enable [remi], [remi-php5.5], [remi-php5.6] for php version 5.5 & 5.6

Please Press Ctrl + x to save this change.
# Step 5
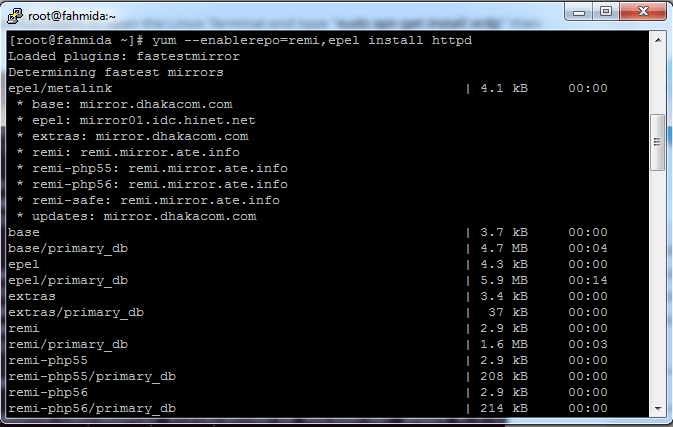
- Install Apache
# yum --enablerepo=remi,epel install httpd
# Step 6
- Install MySQL server
# yum --enablerepo=remi,epel install mysql-server
- Start Mysql
# service mysqld start

# Step 7
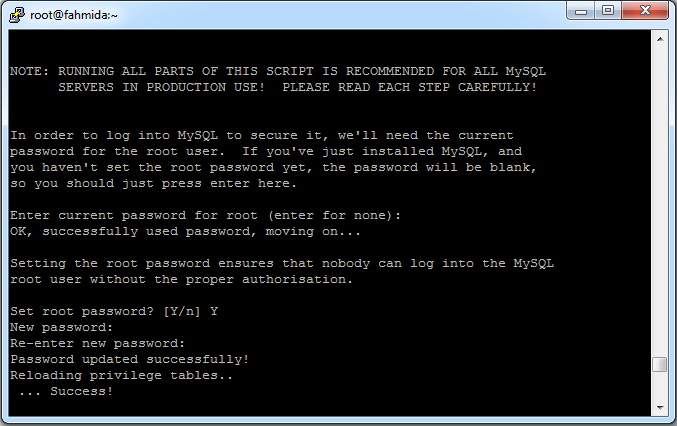
- Set Mysql root Password
In order to log into MySQL to secure it, we’ll need the current password for the root user. Setting the root password ensures that nobody can log into the MySQL root user without the proper authorization.
#/usr/bin/mysql_secure_installation
# Step 8
- Install PHP
#yum --enablerepo=remi,epel install php php-mysql php-mcrypt php-curl php-gd
- Install php dom extension
#sudo yum install php-xml
- Restart the Service
# service httpd restart
# Step 9
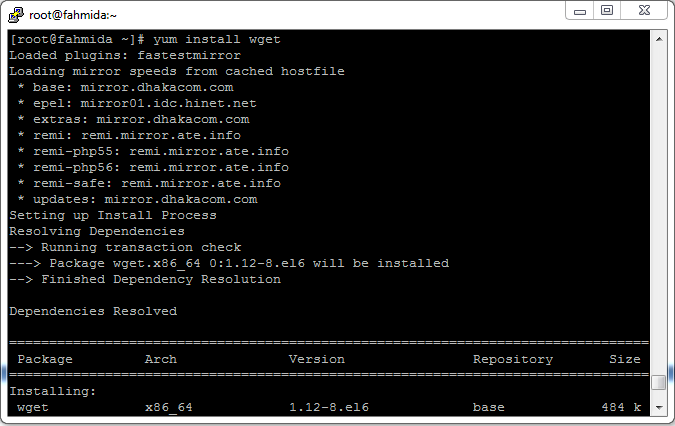
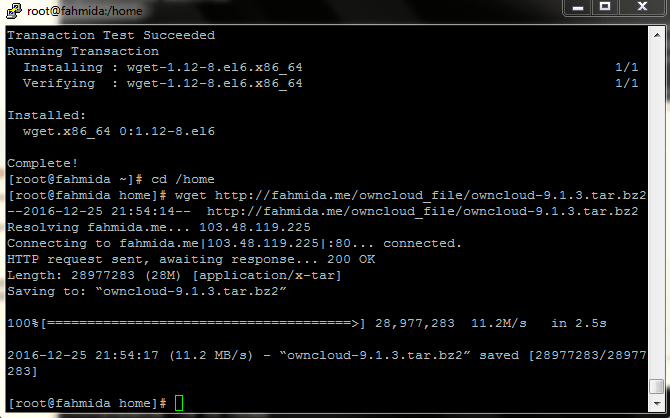
- Install wget for downloading ownCloud
[root@fahmida ~]# yum install wget
# Step 10
- Download the latest ownCloud Source from its official website
You can download your own cloud on your home directory.
[root@fahmida home]# wget http://fahmida.me/owncloud_file/owncloud-9.1.3.tar.bz2
# Step 11
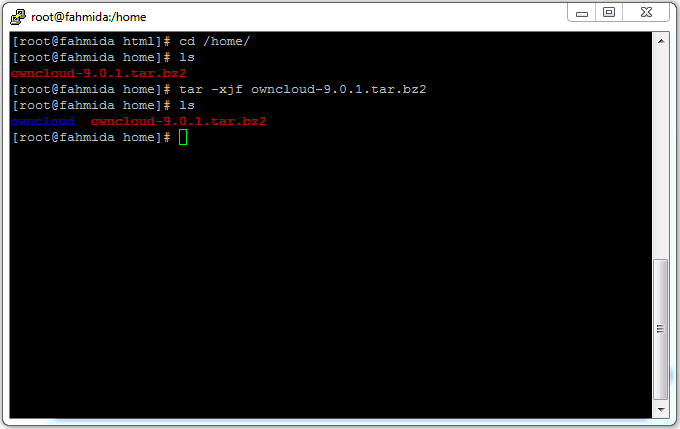
- Extract downloaded archive
Now extract the downloaded archive under the home directory and set up appropriate permissions on files and directories.
[root@fahmida home]# tar -xjf owncloud-9.0.1.tar.bz2
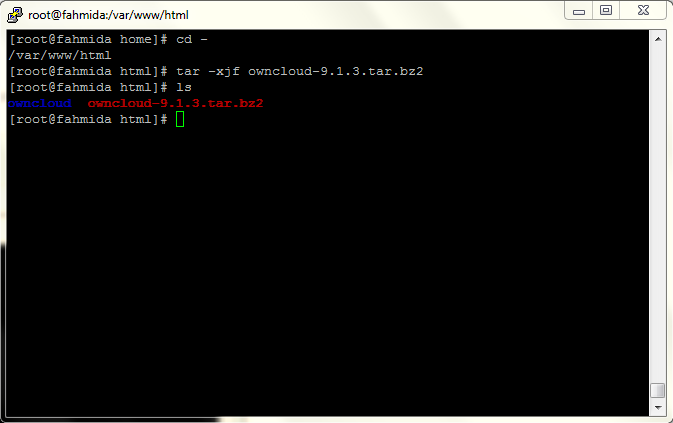
- Copy the archive file into Var directory
[root@fahmida home]# cp /home/owncloud-9.1.3.tar.bz2 /var/www/html
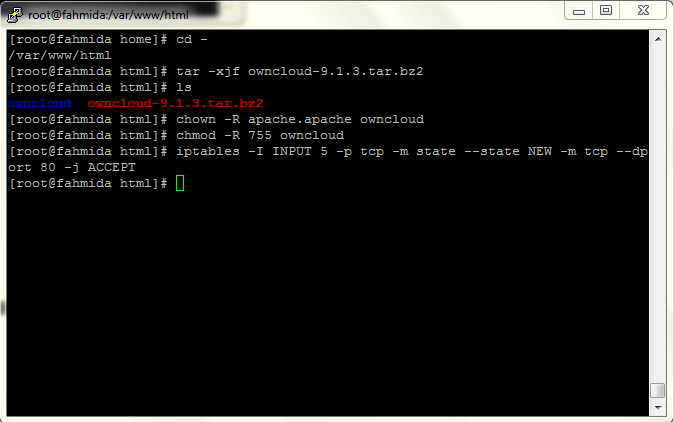
# Step 12
- Give Apache permission on owncloud directory using the following commands
[root@fahmida html]# chown -R apache.apache owncloud
[root@fahmida html]# chmod -R 755 owncloud
- Allow ip table to respond on port 80
[root@fahmida html]# iptables -I INPUT 5 -p tcp -m state --state NEW -m tcp --dport 80 -j ACCEPT
# Step 13
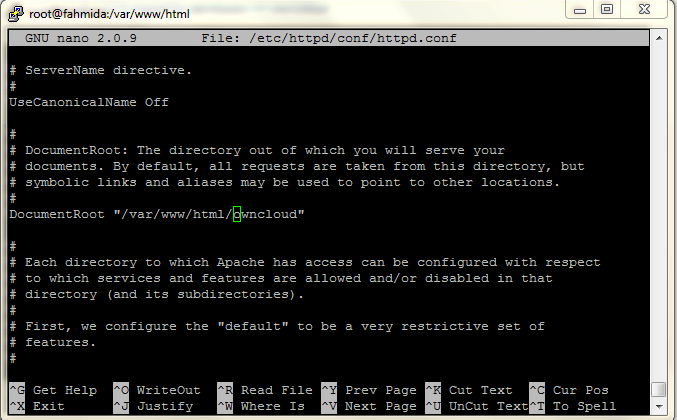
- Change file name “ var/www/html/owncloud” to “/home/owncloud”
[root@fahmida ~]# nano /etc/httpd/conf/httpd.conf
Press Ctrl + w for the search file “ var/www/html/owncloud”. To save this change press Ctrl + x
# Step 14
- Restart the service
[root@fahmida ~]# service httpd restart
# Step 15
- Create MySQL Database and User for configuring owncloud
Use MySQL Database password for logging.
[root@fahmida home]# mysql -u root -p
Enter password:
mysql> CREATE DATABASE owncloud;
mysql> GRANT ALL ON owncloud.* to 'owncloud'@'localhost' IDENTIFIED BY '_password_';
mysql> FLUSH PRIVILEGES;
mysql> quit

# Step 16
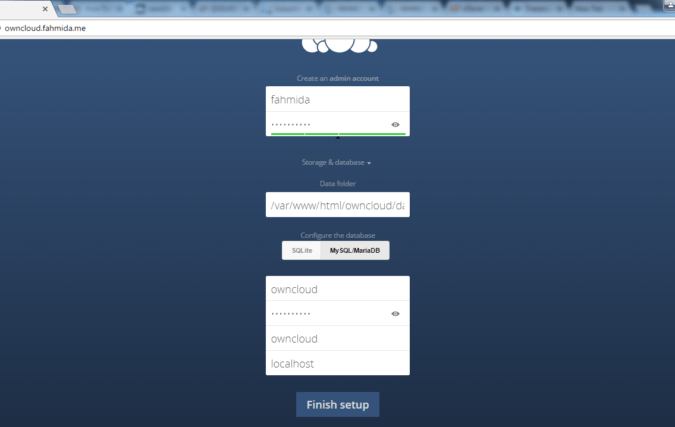
- Now access ownCloud directory on the web browser
# Step 17
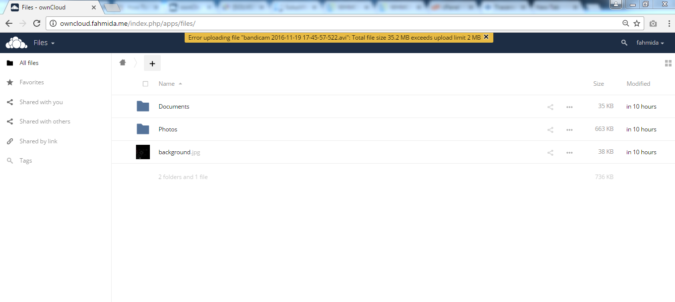
If the maximum file will not upload then you need to Increase the file size.
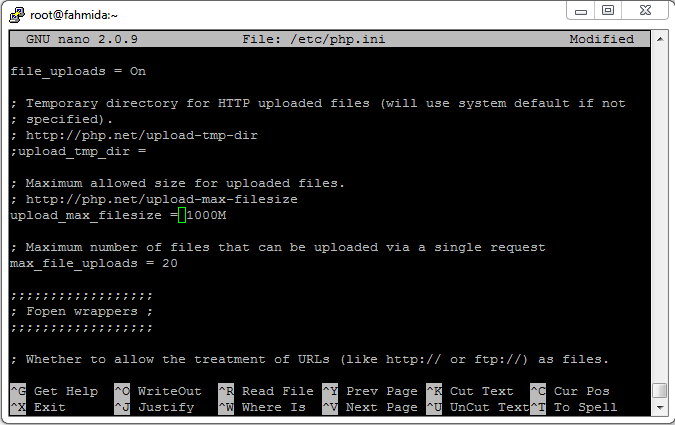
[root@fahmida ~]# nano /etc/php.ini
Press Ctrl + w and search with the current file size. Increase the file size. To save this change press Ctrl + x
# Step 18
- Restart the service.
[root@fahmida ~]# service httpd restart